Although I generally don’t suggest hanging wallpaper over wallpaper, there are circumstances where it can be appropriate. I have had projects where it seemed like the original hanger had installed the old material with a combination of liquid nails and contact adhesive over un-primed walls. It became painfully apparent when I started attempting to strip the room that it just was not happening. These are the occasions when I am forced to break my own rules.
There are a series of steps that have to be taken to prep a room for a this type of installation.
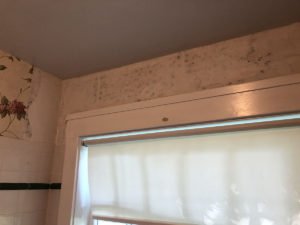
Inspect for loose areas
You must first undertake a careful and methodical inspection of the existing wallpaper. You are looking for any loose spots throughout the room. The best way to accomplish this is to run your hands over the wallpaper. If you come across any loose areas you will hear a change in the tone. It will have a definite hollow sound. When you find a loose spot slice it open with a razor knife in a cross pattern, then paste the flaps down with a good strong adhesive. Remember at this point we want it to stay tight forever.
Look carefully around all the edges, top and bottom as well as all the corners. These are the most likely problem spots in the room. If you come across a loose inside corner, slice it open right down the center of the bubble and paste it down tight on both sides.
Inspect the seams
Run your hand over all the existing seams in the room. If you feel where they are overlapped and a ridge exists you have to flatten it out. There are two ways to do this. First, you an take a piece of sand paper and lightly work it up and down along the overlap until it is flat or you can take a razor blade and carefully run it up the seam as flat to the wall as possible, slicing the overlap away. The sand paper is much safer.
Once you are sure the wall is as flat and sound as it can be you can move on to sealing and priming. I prefer a two step process, starting with a coat of Gardz to create a moisture barrier. This will keep any moisture from the impending installation from working its way into and behind the existing wallpaper and causing problems. While you are rolling the sealer onto the wall, it is a good idea to have a bright light shining down the wall from one side. This will make it very easy to see any places in the wallpaper that are bubbling up while you seal. If you catch any bubbles paste them down and let them dry.
After an adequate drying time, follow the Gardz up with a good coat of R-35 or Rx-35 difficult surface primer. This Primer is specifically designed for application like this and in a pinch could have been used on it own. I prefer to think of the combination of Gardz and the R-35 as insurance and the two products will compliment each other and cover for each other if any area was missed by one or the other.
These two products are both clear. If you are concerned about the pattern or color of the old wallpaper showing through the new, then instead of the R-35 you can use either Zinsser Bullseye 123 or Shieldz Universal Wallpaper Primer as pigmented alternatives.
Now the walls are ready for the new wallpaper